Note: Some of this is just my personal opinion/style but it still shows you the basics and you can adjust from there!
There are a lot of actions out there for black and white conversions, but it’s not hard to create them all on your own! Like any photo, the best black and white images start as properly exposed images with nice directional lighting in them. Although, let’s be honest… black and white can also be the way to ‘fix’ a photo that may have a nice emotional moment but less than perfect colors.
I am going to show you two ways to do black and white images; one using Photoshop and one using Lightroom.
Photoshop Conversions:
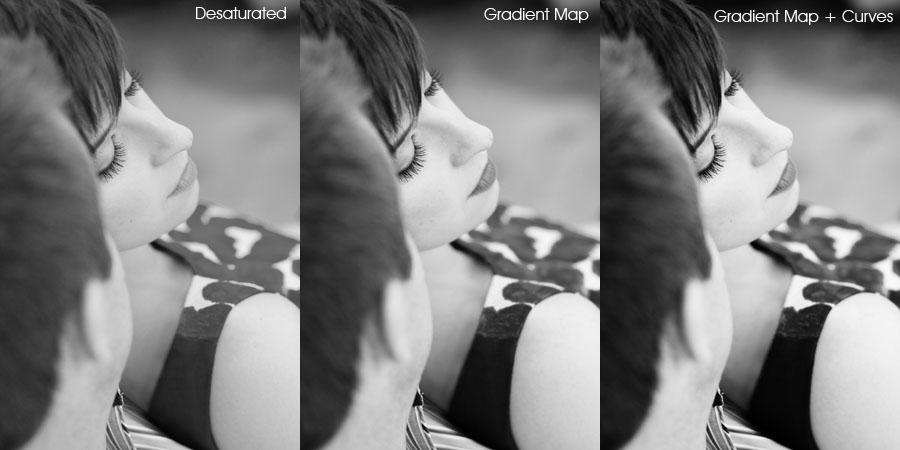
The above images show you three different black and white/grayscale images so that you can compare their differences.
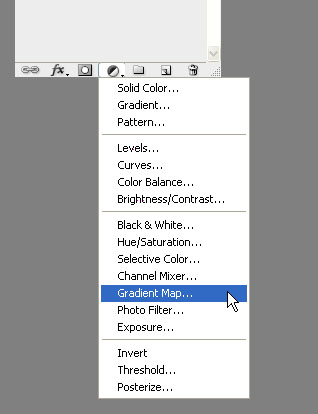
To convert a photo using gradient map, first hit your “D” key to return your colors to the default black and white. Go to your layers palette and click your ‘yin yang’ symbol (as I like to call it) and go to Gradient Map. It should default to the standard gradient and you’ll see your image turn black and white. Next, you’ll hit your yin yang again, and add a curves layer. You’ll add three adjustments, one for the shadows, one for the mid tones and one for highlights. Bring your shadows down, your highlights up and I normally leave the midtones right in the middle, or bring it up just a tiny amount. Be careful with your highlights here, to keep from blowing your lighter spots out. There are times I only use the shadows and midtones and leave my highlights alone.
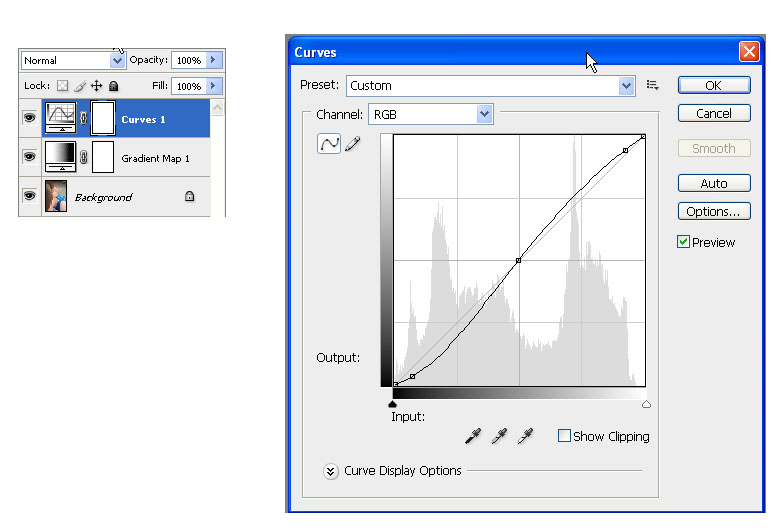
Flatten your image, and there you go! Easy, clean and basic black and white image that pops.
Lightroom Conversions:
At the very top of your Basic section in your Develop tab, you will see Treatment: Color or Grayscale. Click over to Grayscale and your image will automatically be converted to that lovely image on the right.
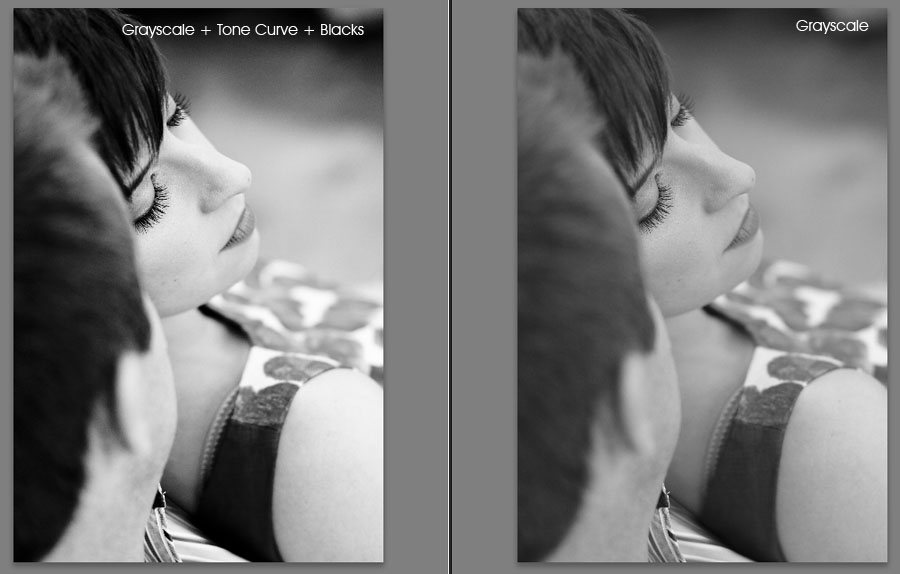
Here, we will actually do something almost identical to what we did in Photoshop. I’ve talked about this tool before in a previous tutorial, but we will use the Tone Curve to add depth to your image. It’s also good to bump your blacks up a little for added depth.
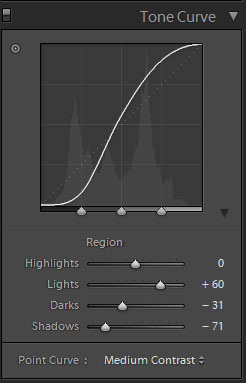
Again, you’ll want to experiment to see what works best for your particular image. If you find something you really like, then be sure to save it as a Preset to use on other images. You can create your own preset by hitting Cntrl + Shift + N or going up to the Develop dropdown on the top of your screen and selecting it there.
If you have any questions about either of these methods, please feel free to ask me! My next tutorial(s) will be a big one…all about blogging, so stay tuned.
