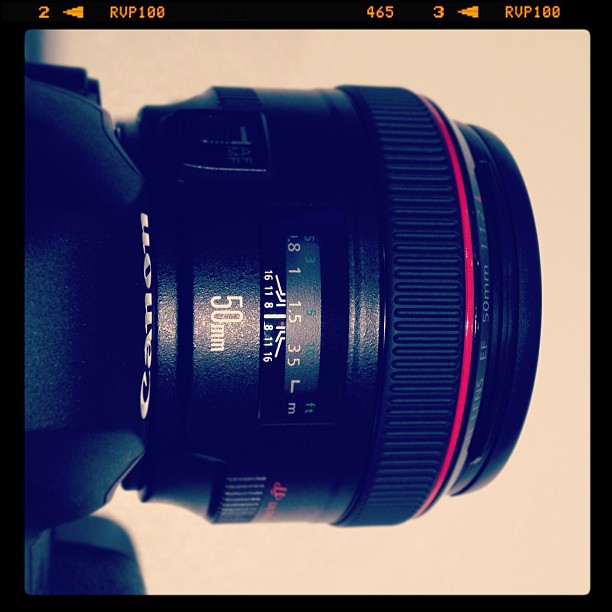
A photo taken by my phone; why not?
Now that you’re a little more familiar with what exactly goes into a lens, it’s time to help you figure out which lens you need. This is going to vary per person; because we don’t all shoot the exact same thing in the exact same way. The best thing you can do is ask your some questions.
What lenses do you already have? You should list out your current lenses included their focal lengths and apertures.
Where are your current lenses failing you? When you are taking photos, what do you wish you could change?
What do you typically shoot and where (OR what WOULD you like to be shooting)? Individual subjects or groups? Indoors or outdoors? Do you want to shoot weddings?*
*Note: There’s a LOT that goes into shooting weddings, but I will talk a little about ideal lenses for shooting wedding type situations if you do or would like to second or get into weddings eventually.
What is your budget? Remember that this is often a case of you get what you pay for, and you can’t always answer ‘as little as possible’! 🙂
Now that you’ve got a list of questions, let’s go over some possible solutions and why these options could work for you. I will say that I am a huge advocate of renting before you buy. There are many lens rental options online that make it affordable for you try a lens for a week or two and get a feel for it. From what I’ve found; a lot of photographers are either zoom people or prime people. I personally prefer to shoot primes but I appreciate a great zoom at times as well!
___________________________________
1.” I run out of room when shooting indoors.”
I hear this commonly for people who own a 50mm prime lens on a cropped sensor body. Remember, this equals out closer to 85mm (around 80mm) so that’s pretty long to shoot in your average home. On a cropped sensor camera, a 35mm lens will actually work out to be around 56mm, so that’s a lot closer to a true 50mm in a 35mm sense. A 28mm will also be just under 50mm (around 45mm) and could be an option as well; but you will risk more distortion with a wider lens.
Canon EF 35mm f/2
Canon EF 28mm f/1.8
Since we’re on the topic of shooting indoors; I really recommend a lens with a wider maximum aperture to let in more available light. Since using artificial light is a whole other ballgame, I won’t go into that here, and I’ll assume you want to use as much available light as possible while shooting. Primes do tend to be the less expensive alternative for this route, but there are some zoom options as well. For cropped sensor bodies (remember, this will NOT work on a full frame camera) there is the Canon 17-55mm f/2.8 lens. The longer end of the lens can work for indoor portraiture, but be careful about getting too close when using a wider focal length. Another very popular lens from Canon’s high end line is the 24-70mm f/2.8L. This lens tends to be very popular for wedding photographers as well because of its fixed f/2.8 aperture.
Canon EF-S 17-55mm f/2.8
Canon EF 24-70mm f/2.8L II
Now, if you’re new to photography, your eyes might be bulging out of your head at the 2k+ price tag on the 24-70mm. Don’t worry, there ARE other options. You can look into third party branded lenses such as the Sigma version of this lens which is less than half the price. I personally only own Canon lenses, but I know many photographers who are very happy with their third party lenses.
2.” I want a narrow depth of field/more bokeh/the background to be out of focus!”
This is a common complaint as well, especially for those who have started out with their kit lenses that have variable apertures. This is going to rely heavily on the aperture of the lens; although the focal length will play into this as well. Let’s talk quickly about what goes into depth of field.
DOF = Aperture + Focal Length + Distance to subject + Distance of subject from background
Aperture: Wider apertures (smaller numbers) give you a narrower depth of field and more subject isolation.
Focal length: A longer focal length will give you a narrower depth of field and more subject isolation. You can use the same aperture at two focal lengths and get much different results.
Distance to subject: This is how far you are from your subject. The closer you get to your subject, the more narrow your depth of field becomes.
Distance of subject from background: The further your subject is from the background, the more subject isolation you get. While it works at times to place your subject directly against your background object; it often creates a stronger image when you bring them out a few feet.
If you are moving from the kit lens that came with your camera (normally the 18-5mm f/3.5-5.6) the most common suggestion is the 50mm f/1.8 lens. The 50mm f/1.8 for Canon is just around $100 and is a great deal for the money when you’re a beginner photographer on a budget. I do want to note that Nikon has a couple of different 50mm 1.8 options. The 50mm f1.8D has NO AF motor while the 50mm f/1.8G DOES. Lower end Nikon bodies are not equipped with AF motors either, so make sure you know what lenses will and will not autofocus on your camera before your make a purchase. If your budget allows, you might also consider jumping straight to the 50mm f/1.4 which has a higher quality build over the 50mm f/1.8.
Why the 50mm? It’s a good mid range length that works in a variety of situations, plus, as I stated, the f/1.8 version is extremely inexpensive and a great learning lens. The 85mm f/1.8 is another popular suggestion, but can be pretty long to use indoors, especially if you’re on a cropped sensor camera. If you do the majority of your shooting outdoors, you might like the 85mm over the 50mm. It never hurts to try both and decide which one fits your style of shooting more.
Canon EF 50mm f/1.8 II
Canon EF 50mm f/1.4
Canon EF 85mm f/1.8
You don’t HAVE to use a prime lens to get great subject separation. There are a large number of portrait photographers who enjoy using the 70-200mm f/2.8 as a portrait lens. Remember that focal length has a lot to do with your depth of field, so at 200mm, you have the opportunity for some really creamy bokeh. However, this isn’t the lens for everybody. I know I’m not a big fan of shooting with it for my style of interacting with clients, since you have to stand so far back to shoot on the long end. But, as I’ve said, there is a right answer for everybody. There are two versions of the 70-200mm f/2.8 from Canon. One of them has IS and one of them does not. This is a heavy lens, so it can come in handy, but if you do most of your shooting outdoors in the daylight, it might not be absolutely necessary. There is also an f/4 version of this lens as well, both with and without IS.
Canon EF 70-200mm f/2.8L USM (Non IS)
Canon EF 70-200mm f/2.8L IS II USM
_______________
Whew, that was a lot more information to chew on! Remember that I’m only hitting some of the basics of these concepts. I will be opening up mentoring sessions very soon for those interested in learning more in depth information. Be sure to like my Facebook page for updates!
Stay tuned for part three of this series.
